-
1. Першыя крокі
- 1.1 About Version Control
- 1.2 A Short History of Git
- 1.3 What is Git?
- 1.4 The Command Line
- 1.5 Installing Git
- 1.6 First-Time Git Setup
- 1.7 Getting Help
- 1.8 Падсумаваньне
-
2. Git Basics
- 2.1 Getting a Git Repository
- 2.2 Recording Changes to the Repository
- 2.3 Viewing the Commit History
- 2.4 Undoing Things
- 2.5 Working with Remotes
- 2.6 Tagging
- 2.7 Git Aliases
- 2.8 Summary
-
3. Git Branching
- 3.1 Branches in a Nutshell
- 3.2 Basic Branching and Merging
- 3.3 Branch Management
- 3.4 Branching Workflows
- 3.5 Remote Branches
- 3.6 Rebasing
- 3.7 Summary
-
4. Git on the Server
- 4.1 The Protocols
- 4.2 Getting Git on a Server
- 4.3 Generating Your SSH Public Key
- 4.4 Setting Up the Server
- 4.5 Git Daemon
- 4.6 Smart HTTP
- 4.7 GitWeb
- 4.8 GitLab
- 4.9 Third Party Hosted Options
- 4.10 Summary
-
5. Distributed Git
- 5.1 Distributed Workflows
- 5.2 Contributing to a Project
- 5.3 Maintaining a Project
- 5.4 Summary
-
6. GitHub
-
7. Git Tools
- 7.1 Revision Selection
- 7.2 Interactive Staging
- 7.3 Stashing and Cleaning
- 7.4 Signing Your Work
- 7.5 Searching
- 7.6 Rewriting History
- 7.7 Reset Demystified
- 7.8 Advanced Merging
- 7.9 Rerere
- 7.10 Debugging with Git
- 7.11 Submodules
- 7.12 Bundling
- 7.13 Replace
- 7.14 Credential Storage
- 7.15 Summary
-
8. Customizing Git
- 8.1 Git Configuration
- 8.2 Git Attributes
- 8.3 Git Hooks
- 8.4 An Example Git-Enforced Policy
- 8.5 Summary
-
9. Git and Other Systems
- 9.1 Git as a Client
- 9.2 Migrating to Git
- 9.3 Summary
-
10. Git Internals
- 10.1 Plumbing and Porcelain
- 10.2 Git Objects
- 10.3 Git References
- 10.4 Packfiles
- 10.5 The Refspec
- 10.6 Transfer Protocols
- 10.7 Maintenance and Data Recovery
- 10.8 Environment Variables
- 10.9 Summary
-
A1. Дадатак A: Git in Other Environments
- A1.1 Graphical Interfaces
- A1.2 Git in Visual Studio
- A1.3 Git in Visual Studio Code
- A1.4 Git in IntelliJ / PyCharm / WebStorm / PhpStorm / RubyMine
- A1.5 Git in Sublime Text
- A1.6 Git in Bash
- A1.7 Git in Zsh
- A1.8 Git in PowerShell
- A1.9 Summary
-
A2. Дадатак B: Embedding Git in your Applications
- A2.1 Command-line Git
- A2.2 Libgit2
- A2.3 JGit
- A2.4 go-git
- A2.5 Dulwich
-
A3. Дадатак C: Git Commands
- A3.1 Setup and Config
- A3.2 Getting and Creating Projects
- A3.3 Basic Snapshotting
- A3.4 Branching and Merging
- A3.5 Sharing and Updating Projects
- A3.6 Inspection and Comparison
- A3.7 Debugging
- A3.8 Patching
- A3.9 Email
- A3.10 External Systems
- A3.11 Administration
- A3.12 Plumbing Commands
6.3 GitHub - Maintaining a Project
Maintaining a Project
Now that we’re comfortable contributing to a project, let’s look at the other side: creating, maintaining and administering your own project.
Creating a New Repository
Let’s create a new repository to share our project code with.
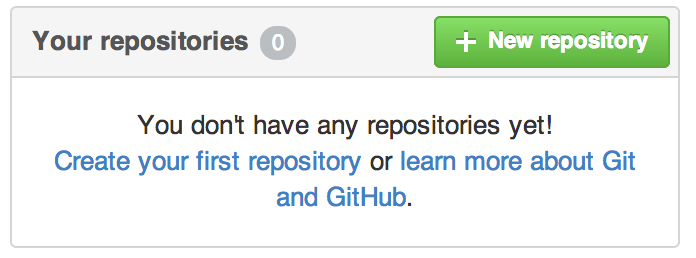
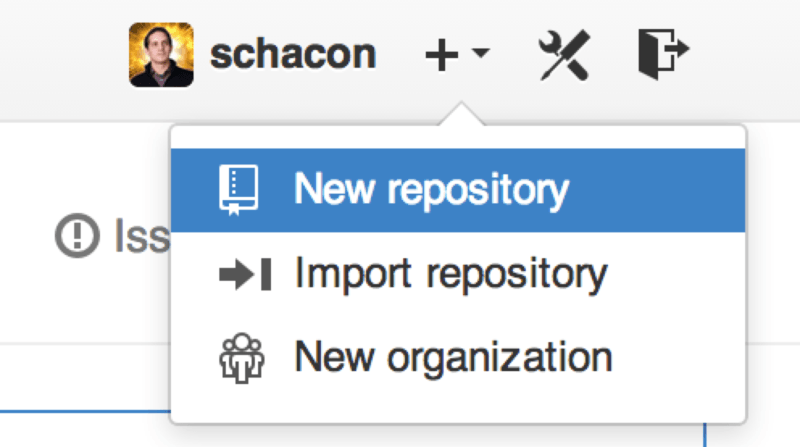
Start by clicking the “New repository” button on the right-hand side of the dashboard, or from the + button in the top toolbar next to your username as seen in The “New repository” dropdown.
This takes you to the “new repository” form:
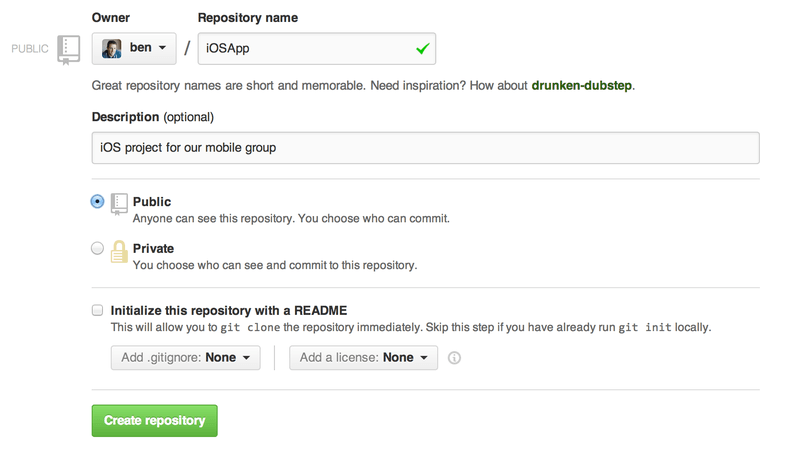
All you really have to do here is provide a project name; the rest of the fields are completely optional.
For now, just click the “Create Repository” button, and boom – you have a new repository on GitHub, named <user>/<project_name>.
Since you have no code there yet, GitHub will show you instructions for how to create a brand-new Git repository, or connect an existing Git project. We won’t belabor this here; if you need a refresher, check out Git Basics.
Now that your project is hosted on GitHub, you can give the URL to anyone you want to share your project with.
Every project on GitHub is accessible over HTTPS as https://github.com/<user>/<project_name>, and over SSH as git@github.com:<user>/<project_name>.
Git can fetch from and push to both of these URLs, but they are access-controlled based on the credentials of the user connecting to them.
|
Заўвага
|
It is often preferable to share the HTTPS based URL for a public project, since the user does not have to have a GitHub account to access it for cloning. Users will have to have an account and an uploaded SSH key to access your project if you give them the SSH URL. The HTTPS one is also exactly the same URL they would paste into a browser to view the project there. |
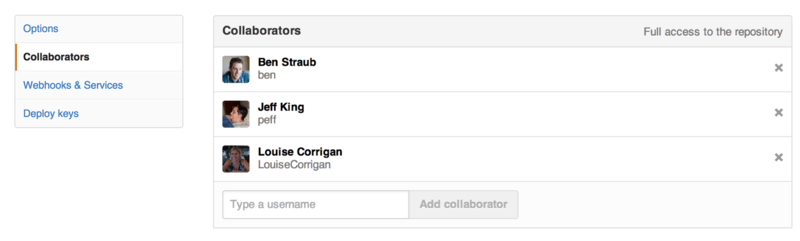
Adding Collaborators
If you’re working with other people who you want to give commit access to, you need to add them as “collaborators”. If Ben, Jeff, and Louise all sign up for accounts on GitHub, and you want to give them push access to your repository, you can add them to your project. Doing so will give them “push” access, which means they have both read and write access to the project and Git repository.
Click the “Settings” link at the bottom of the right-hand sidebar.
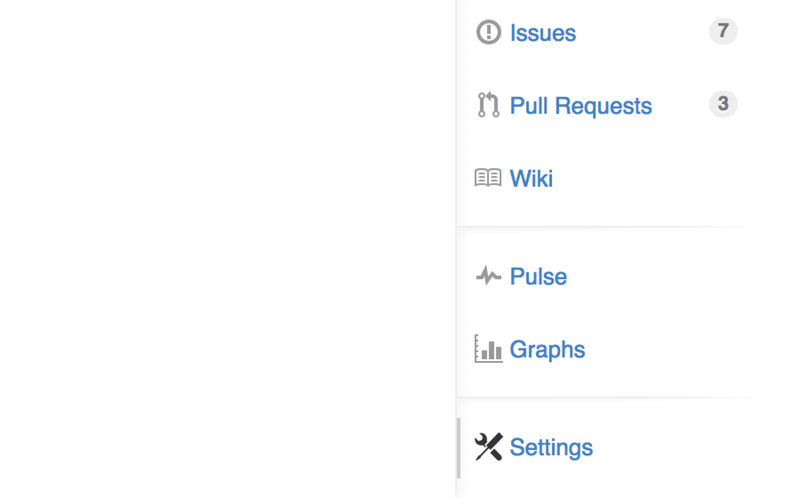
Then select “Collaborators” from the menu on the left-hand side. Then, just type a username into the box, and click “Add collaborator.” You can repeat this as many times as you like to grant access to everyone you like. If you need to revoke access, just click the “X” on the right-hand side of their row.
Managing Pull Requests
Now that you have a project with some code in it and maybe even a few collaborators who also have push access, let’s go over what to do when you get a Pull Request yourself.
Pull Requests can either come from a branch in a fork of your repository or they can come from another branch in the same repository. The only difference is that the ones in a fork are often from people where you can’t push to their branch and they can’t push to yours, whereas with internal Pull Requests generally both parties can access the branch.
For these examples, let’s assume you are “tonychacon” and you’ve created a new Arduino code project named “fade”.
Email Notifications
Someone comes along and makes a change to your code and sends you a Pull Request. You should get an email notifying you about the new Pull Request and it should look something like Email notification of a new Pull Request.
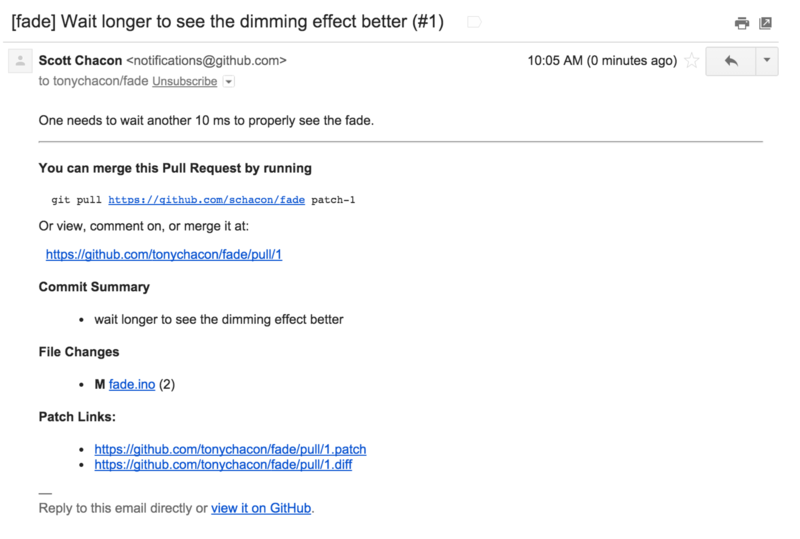
There are a few things to notice about this email. It will give you a small diffstat — a list of files that have changed in the Pull Request and by how much. It gives you a link to the Pull Request on GitHub. It also gives you a few URLs that you can use from the command line.
If you notice the line that says git pull <url> patch-1, this is a simple way to merge in a remote branch without having to add a remote.
We went over this quickly in Checking Out Remote Branches.
If you wish, you can create and switch to a topic branch and then run this command to merge in the Pull Request changes.
The other interesting URLs are the .diff and .patch URLs, which as you may guess, provide unified diff and patch versions of the Pull Request.
You could technically merge in the Pull Request work with something like this:
$ curl https://github.com/tonychacon/fade/pull/1.patch | git amCollaborating on the Pull Request
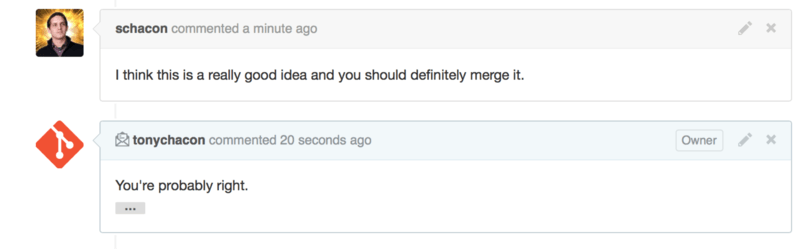
As we covered in The GitHub Flow, you can now have a conversation with the person who opened the Pull Request. You can comment on specific lines of code, comment on whole commits or comment on the entire Pull Request itself, using GitHub Flavored Markdown everywhere.
Every time someone else comments on the Pull Request you will continue to get email notifications so you know there is activity happening. They will each have a link to the Pull Request where the activity is happening and you can also directly respond to the email to comment on the Pull Request thread.
Once the code is in a place you like and want to merge it in, you can either pull the code down and merge it locally, either with the git pull <url> <branch> syntax we saw earlier, or by adding the fork as a remote and fetching and merging.
If the merge is trivial, you can also just hit the “Merge” button on the GitHub site. This will do a “non-fast-forward” merge, creating a merge commit even if a fast-forward merge was possible. This means that no matter what, every time you hit the merge button, a merge commit is created. As you can see in Merge button and instructions for merging a Pull Request manually, GitHub gives you all of this information if you click the hint link.
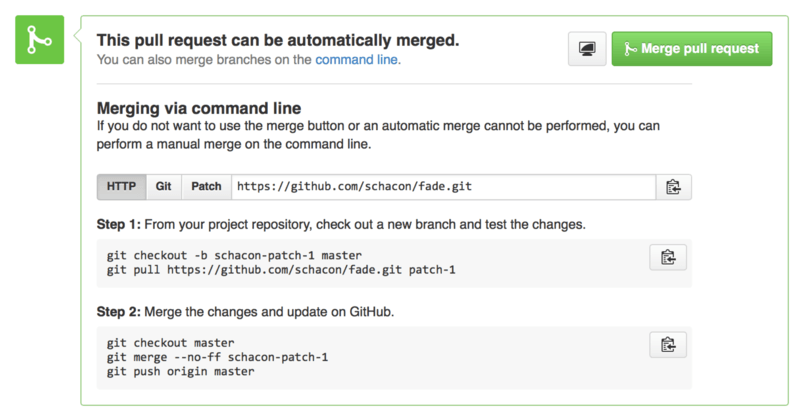
If you decide you don’t want to merge it, you can also just close the Pull Request and the person who opened it will be notified.
Pull Request Refs
If you’re dealing with a lot of Pull Requests and don’t want to add a bunch of remotes or do one time pulls every time, there is a neat trick that GitHub allows you to do. This is a bit of an advanced trick and we’ll go over the details of this a bit more in The Refspec, but it can be pretty useful.
GitHub actually advertises the Pull Request branches for a repository as sort of pseudo-branches on the server. By default you don’t get them when you clone, but they are there in an obscured way and you can access them pretty easily.
To demonstrate this, we’re going to use a low-level command (often referred to as a “plumbing” command, which we’ll read about more in Plumbing and Porcelain) called ls-remote.
This command is generally not used in day-to-day Git operations but it’s useful to show us what references are present on the server.
If we run this command against the “blink” repository we were using earlier, we will get a list of all the branches and tags and other references in the repository.
$ git ls-remote https://github.com/schacon/blink
10d539600d86723087810ec636870a504f4fee4d	HEAD
10d539600d86723087810ec636870a504f4fee4d	refs/heads/master
6a83107c62950be9453aac297bb0193fd743cd6e	refs/pull/1/head
afe83c2d1a70674c9505cc1d8b7d380d5e076ed3	refs/pull/1/merge
3c8d735ee16296c242be7a9742ebfbc2665adec1	refs/pull/2/head
15c9f4f80973a2758462ab2066b6ad9fe8dcf03d	refs/pull/2/merge
a5a7751a33b7e86c5e9bb07b26001bb17d775d1a	refs/pull/4/head
31a45fc257e8433c8d8804e3e848cf61c9d3166c	refs/pull/4/merge
Of course, if you’re in your repository and you run git ls-remote origin or whatever remote you want to check, it will show you something similar to this.
If the repository is on GitHub and you have any Pull Requests that have been opened, you’ll get these references that are prefixed with refs/pull/.
These are basically branches, but since they’re not under refs/heads/ you don’t get them normally when you clone or fetch from the server — the process of fetching ignores them normally.
There are two references per Pull Request - the one that ends in /head points to exactly the same commit as the last commit in the Pull Request branch.
So if someone opens a Pull Request in our repository and their branch is named bug-fix and it points to commit a5a775, then in our repository we will not have a bug-fix branch (since that’s in their fork), but we will have pull/<pr#>/head that points to a5a775.
This means that we can pretty easily pull down every Pull Request branch in one go without having to add a bunch of remotes.
Now, you could do something like fetching the reference directly.
$ git fetch origin refs/pull/958/head
From https://github.com/libgit2/libgit2
 * branch            refs/pull/958/head -> FETCH_HEAD
This tells Git, “Connect to the origin remote, and download the ref named refs/pull/958/head.”
Git happily obeys, and downloads everything you need to construct that ref, and puts a pointer to the commit you want under .git/FETCH_HEAD.
You can follow that up with git merge FETCH_HEAD into a branch you want to test it in, but that merge commit message looks a bit weird.
Also, if you’re reviewing a lot of pull requests, this gets tedious.
There’s also a way to fetch all of the pull requests, and keep them up to date whenever you connect to the remote.
Open up .git/config in your favorite editor, and look for the origin remote.
It should look a bit like this:
[remote "origin"]
    url = https://github.com/libgit2/libgit2
    fetch = +refs/heads/*:refs/remotes/origin/*
That line that begins with fetch = is a “refspec.”
It’s a way of mapping names on the remote with names in your local .git directory.
This particular one tells Git, "the things on the remote that are under refs/heads should go in my local repository under refs/remotes/origin."
You can modify this section to add another refspec:
[remote "origin"]
    url = https://github.com/libgit2/libgit2.git
    fetch = +refs/heads/*:refs/remotes/origin/*
    fetch = +refs/pull/*/head:refs/remotes/origin/pr/*
That last line tells Git, “All the refs that look like refs/pull/123/head should be stored locally like refs/remotes/origin/pr/123.”
Now, if you save that file, and do a git fetch:
$ git fetch
# …
 * [new ref]         refs/pull/1/head -> origin/pr/1
 * [new ref]         refs/pull/2/head -> origin/pr/2
 * [new ref]         refs/pull/4/head -> origin/pr/4
# …
Now all of the remote pull requests are represented locally with refs that act much like tracking branches; they’re read-only, and they update when you do a fetch. This makes it super easy to try the code from a pull request locally:
$ git checkout pr/2
Checking out files: 100% (3769/3769), done.
Branch pr/2 set up to track remote branch pr/2 from origin.
Switched to a new branch 'pr/2'
The eagle-eyed among you would note the head on the end of the remote portion of the refspec.
There’s also a refs/pull/#/merge ref on the GitHub side, which represents the commit that would result if you push the “merge” button on the site.
This can allow you to test the merge before even hitting the button.
Pull Requests on Pull Requests
Not only can you open Pull Requests that target the main or master branch, you can actually open a Pull Request targeting any branch in the network.
In fact, you can even target another Pull Request.
If you see a Pull Request that is moving in the right direction and you have an idea for a change that depends on it or you’re not sure is a good idea, or you just don’t have push access to the target branch, you can open a Pull Request directly to it.
When you go to open a Pull Request, there is a box at the top of the page that specifies which branch you’re requesting to pull to and which you’re requesting to pull from. If you hit the “Edit” button at the right of that box you can change not only the branches but also which fork.
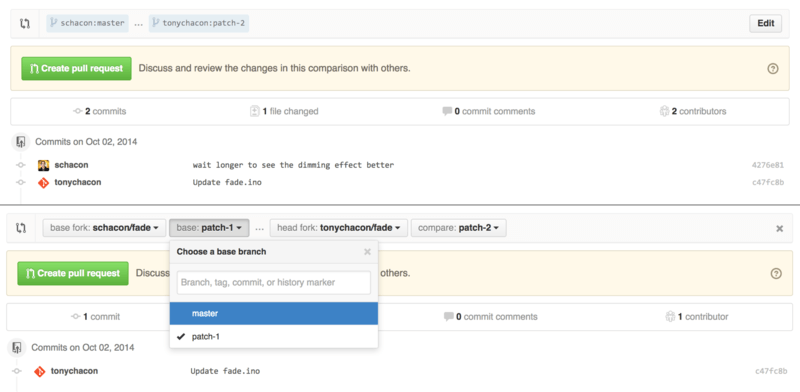
Here you can fairly easily specify to merge your new branch into another Pull Request or another fork of the project.
Mentions and Notifications
GitHub also has a pretty nice notifications system built in that can come in handy when you have questions or need feedback from specific individuals or teams.
In any comment you can start typing a @ character and it will begin to autocomplete with the names and usernames of people who are collaborators or contributors in the project.
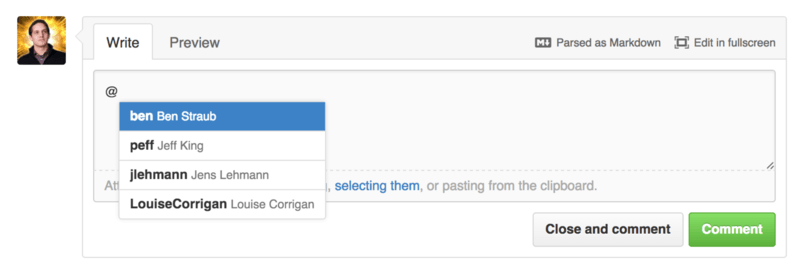
You can also mention a user who is not in that dropdown, but often the autocompleter can make it faster.
Once you post a comment with a user mention, that user will be notified. This means that this can be a really effective way of pulling people into conversations rather than making them poll. Very often in Pull Requests on GitHub people will pull in other people on their teams or in their company to review an Issue or Pull Request.
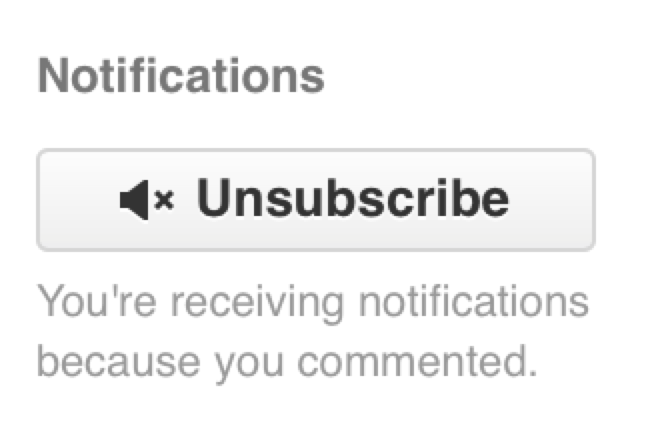
If someone gets mentioned on a Pull Request or Issue, they will be “subscribed” to it and will continue getting notifications any time some activity occurs on it. You will also be subscribed to something if you opened it, if you’re watching the repository or if you comment on something. If you no longer wish to receive notifications, there is an “Unsubscribe” button on the page you can click to stop receiving updates on it.
The Notifications Page
When we mention “notifications” here with respect to GitHub, we mean a specific way that GitHub tries to get in touch with you when events happen and there are a few different ways you can configure them. If you go to the “Notification center” tab from the settings page, you can see some of the options you have.
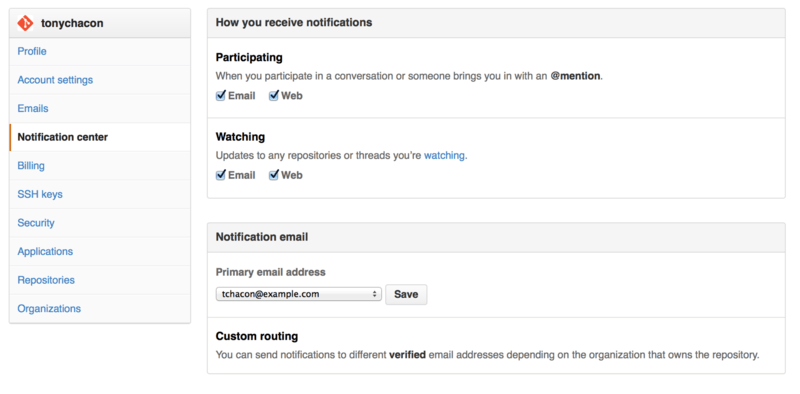
The two choices are to get notifications over “Email” and over “Web” and you can choose either, neither or both for when you actively participate in things and for activity on repositories you are watching.
Web Notifications
Web notifications only exist on GitHub and you can only check them on GitHub. If you have this option selected in your preferences and a notification is triggered for you, you will see a small blue dot over your notifications icon at the top of your screen as seen in Notification center.
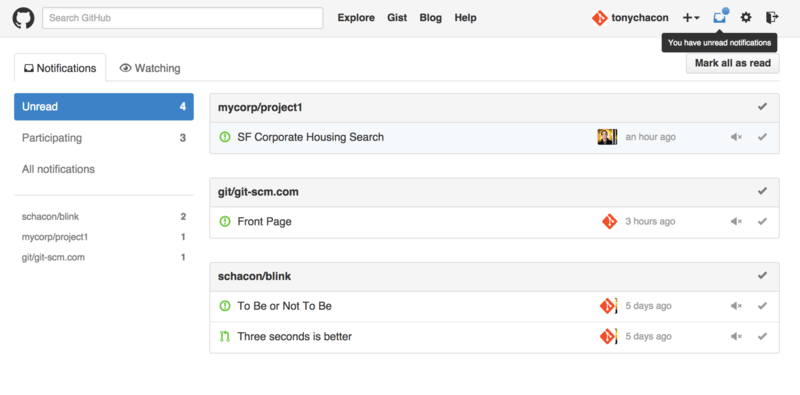
If you click on that, you will see a list of all the items you have been notified about, grouped by project. You can filter to the notifications of a specific project by clicking on its name in the left hand sidebar. You can also acknowledge the notification by clicking the checkmark icon next to any notification, or acknowledge all of the notifications in a project by clicking the checkmark at the top of the group. There is also a mute button next to each checkmark that you can click to not receive any further notifications on that item.
All of these tools are very useful for handling large numbers of notifications. Many GitHub power users will simply turn off email notifications entirely and manage all of their notifications through this screen.
Email Notifications
Email notifications are the other way you can handle notifications through GitHub. If you have this turned on you will get emails for each notification. We saw examples of this in Comments sent as email notifications and Email notification of a new Pull Request. The emails will also be threaded properly, which is nice if you’re using a threading email client.
There is also a fair amount of metadata embedded in the headers of the emails that GitHub sends you, which can be really helpful for setting up custom filters and rules.
For instance, if we look at the actual email headers sent to Tony in the email shown in Email notification of a new Pull Request, we will see the following among the information sent:
To: tonychacon/fade <fade@noreply.github.com>
Message-ID: <tonychacon/fade/pull/1@github.com>
Subject: [fade] Wait longer to see the dimming effect better (#1)
X-GitHub-Recipient: tonychacon
List-ID: tonychacon/fade <fade.tonychacon.github.com>
List-Archive: https://github.com/tonychacon/fade
List-Post: <mailto:reply+i-4XXX@reply.github.com>
List-Unsubscribe: <mailto:unsub+i-XXX@reply.github.com>,...
X-GitHub-Recipient-Address: tchacon@example.com
There are a couple of interesting things here.
If you want to highlight or re-route emails to this particular project or even Pull Request, the information in Message-ID gives you all the data in <user>/<project>/<type>/<id> format.
If this were an issue, for example, the <type> field would have been “issues” rather than “pull”.
The List-Post and List-Unsubscribe fields mean that if you have a mail client that understands those, you can easily post to the list or “Unsubscribe” from the thread.
That would be essentially the same as clicking the “mute” button on the web version of the notification or “Unsubscribe” on the Issue or Pull Request page itself.
It’s also worth noting that if you have both email and web notifications enabled and you read the email version of the notification, the web version will be marked as read as well if you have images allowed in your mail client.
Special Files
There are a couple of special files that GitHub will notice if they are present in your repository.
README
The first is the README file, which can be of nearly any format that GitHub recognizes as prose.
For example, it could be README, README.md, README.asciidoc, etc.
If GitHub sees a README file in your source, it will render it on the landing page of the project.
Many teams use this file to hold all the relevant project information for someone who might be new to the repository or project. This generally includes things like:
-
What the project is for
-
How to configure and install it
-
An example of how to use it or get it running
-
The license that the project is offered under
-
How to contribute to it
Since GitHub will render this file, you can embed images or links in it for added ease of understanding.
CONTRIBUTING
The other special file that GitHub recognizes is the CONTRIBUTING file.
If you have a file named CONTRIBUTING with any file extension, GitHub will show Opening a Pull Request when a CONTRIBUTING file exists when anyone starts opening a Pull Request.
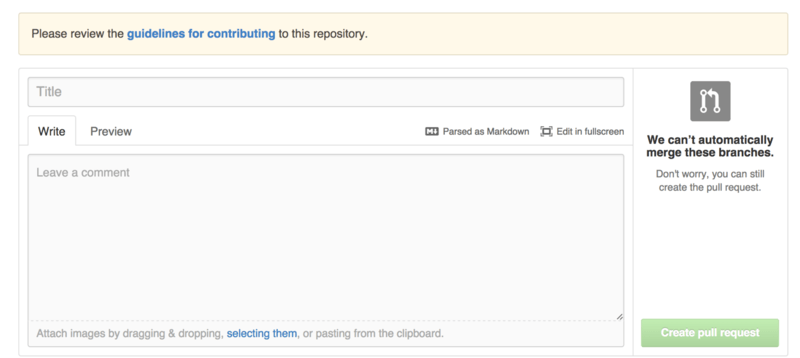
The idea here is that you can specify specific things you want or don’t want in a Pull Request sent to your project. This way people may actually read the guidelines before opening the Pull Request.
Project Administration
Generally there are not a lot of administrative things you can do with a single project, but there are a couple of items that might be of interest.
Changing the Default Branch
If you are using a branch other than “master” as your default branch that you want people to open Pull Requests on or see by default, you can change that in your repository’s settings page under the “Options” tab.
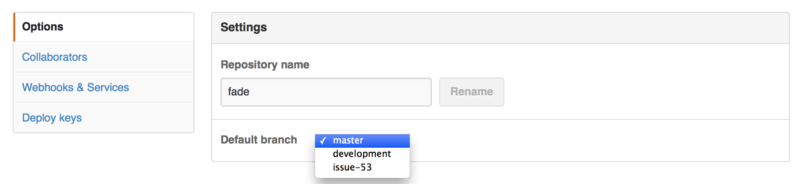
Simply change the default branch in the dropdown and that will be the default for all major operations from then on, including which branch is checked out by default when someone clones the repository.
Transferring a Project
If you would like to transfer a project to another user or an organization in GitHub, there is a “Transfer ownership” option at the bottom of the same “Options” tab of your repository settings page that allows you to do this.
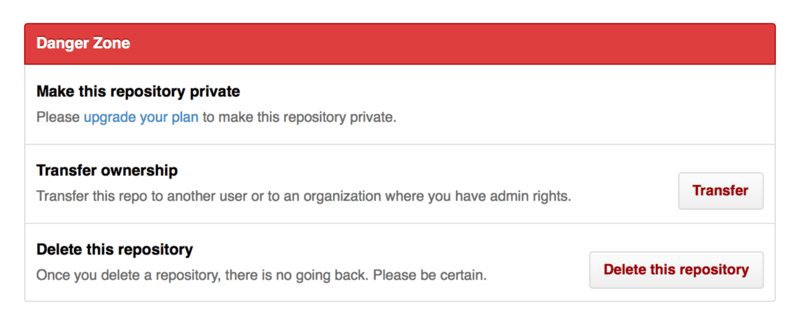
This is helpful if you are abandoning a project and someone wants to take it over, or if your project is getting bigger and want to move it into an organization.
Not only does this move the repository along with all its watchers and stars to another place, it also sets up a redirect from your URL to the new place. It will also redirect clones and fetches from Git, not just web requests.